Get Started with Zapier
Looking to automate your workflows and connect WillowSpace to your other favorite platforms? You can use Zapier webhooks to pass information from WillowSpace to hundreds of tools — and it only takes a few steps to get started.
Here’s how to get started:
-
Log into your WillowSpace account.
-
Navigate to Account > Integrations.
-
Find the Zapier (BETA) card and click it.
-
Request access by filling out the short form.
Once approved, you’ll get an email confirmation and can return to this section to begin using your Zapier integration!
How to Set Up Webhooks with Zapier
Follow these steps to connect WillowSpace with your preferred apps using webhooks:
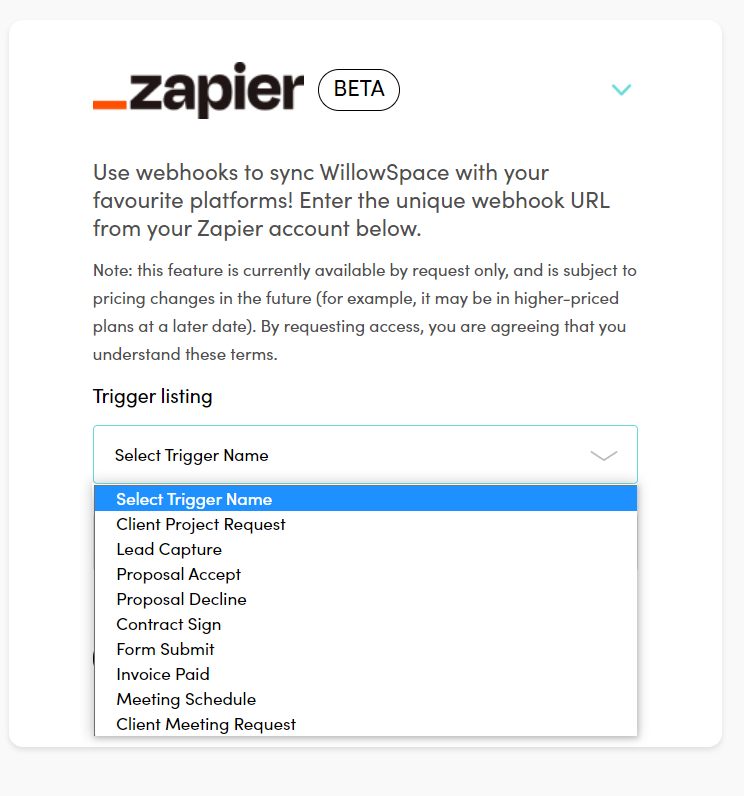
Step 1: In WillowSpace, select your desired trigger from the dropdown (e.g., “Proposal Accepted”).
Step 2: In Zapier, click Create Zap.
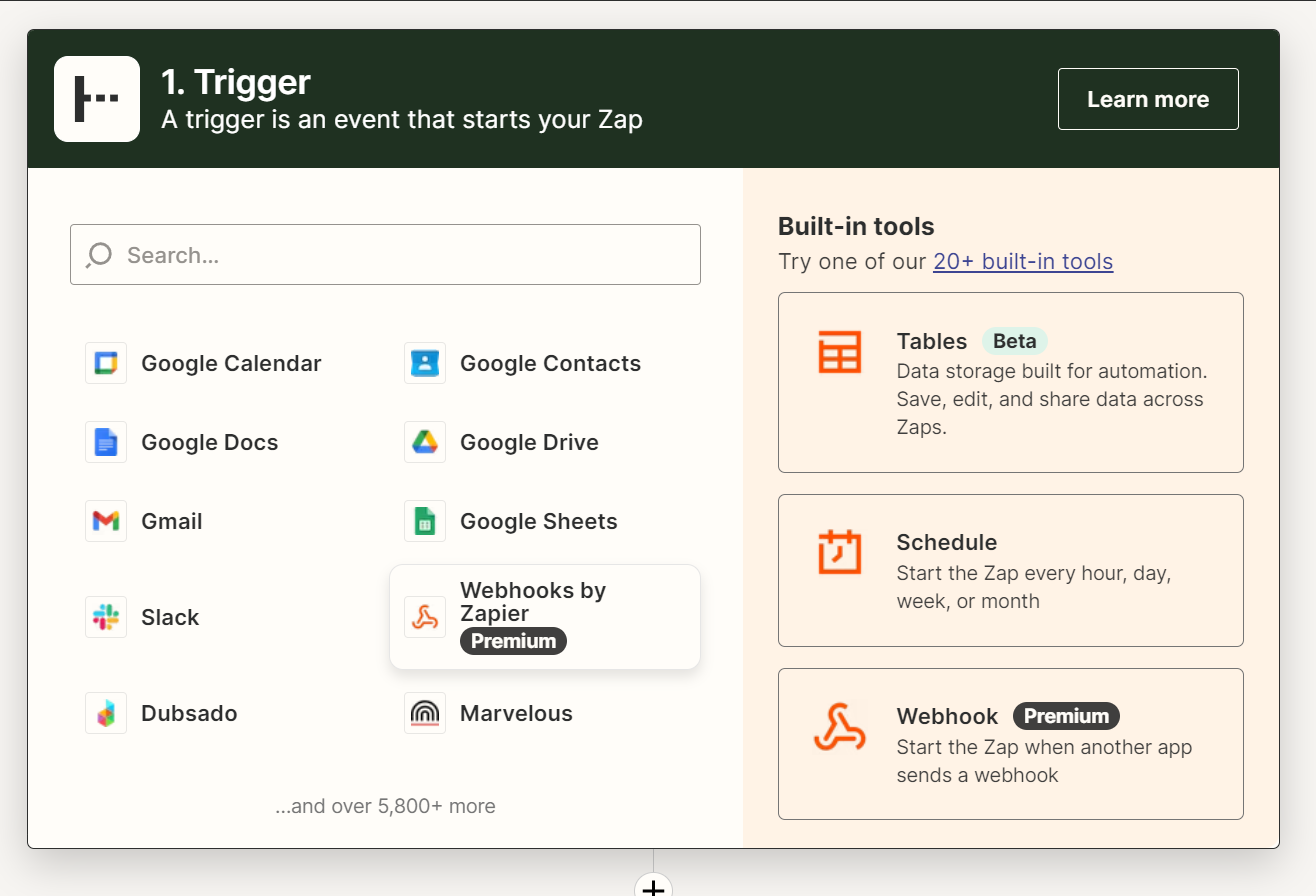
Step 3: Choose Webhooks by Zapier as your trigger app.
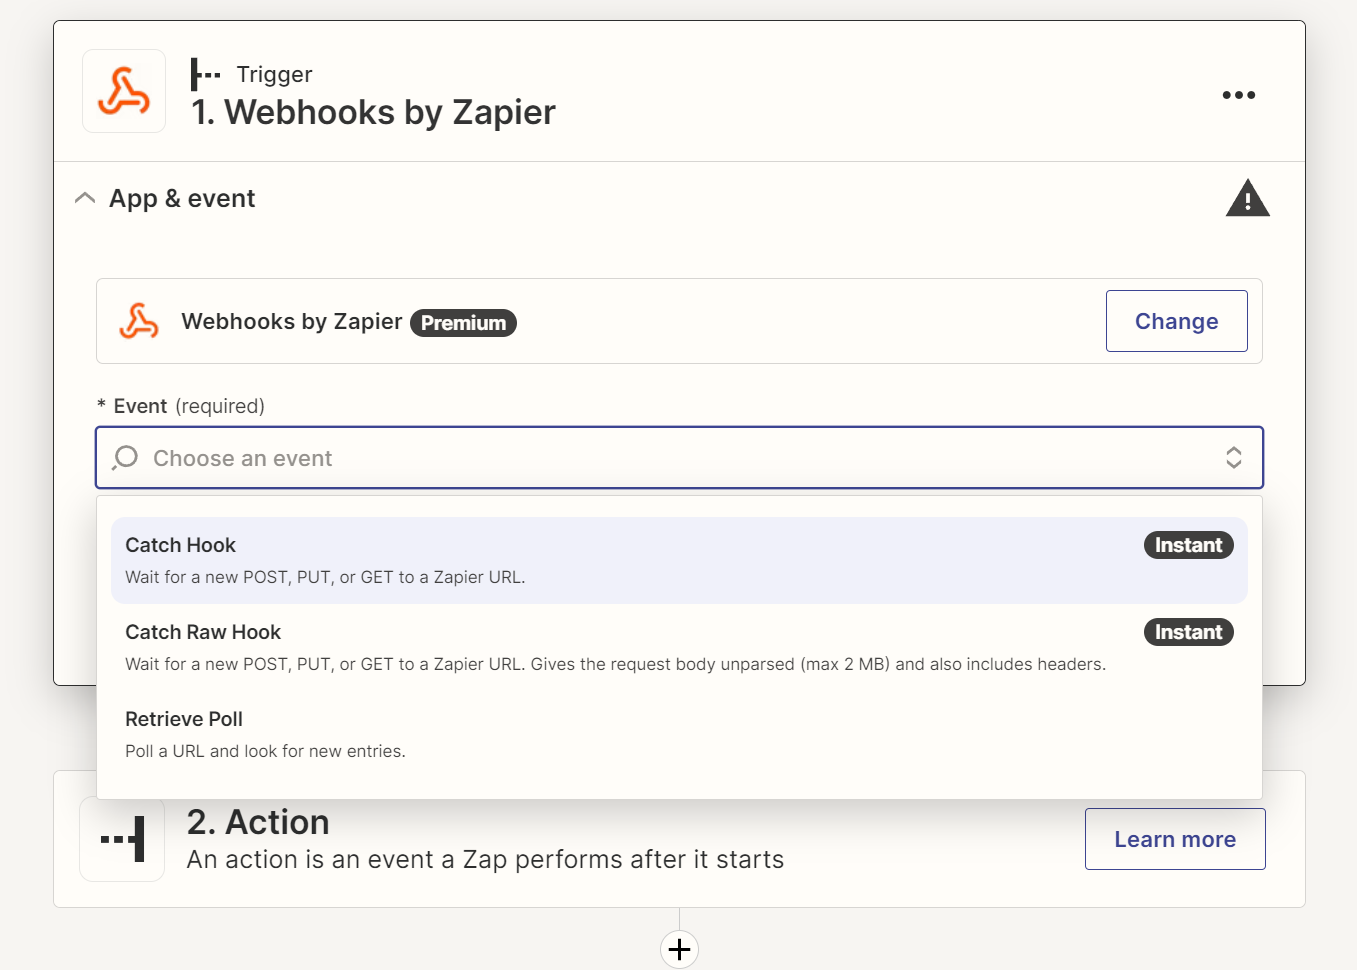
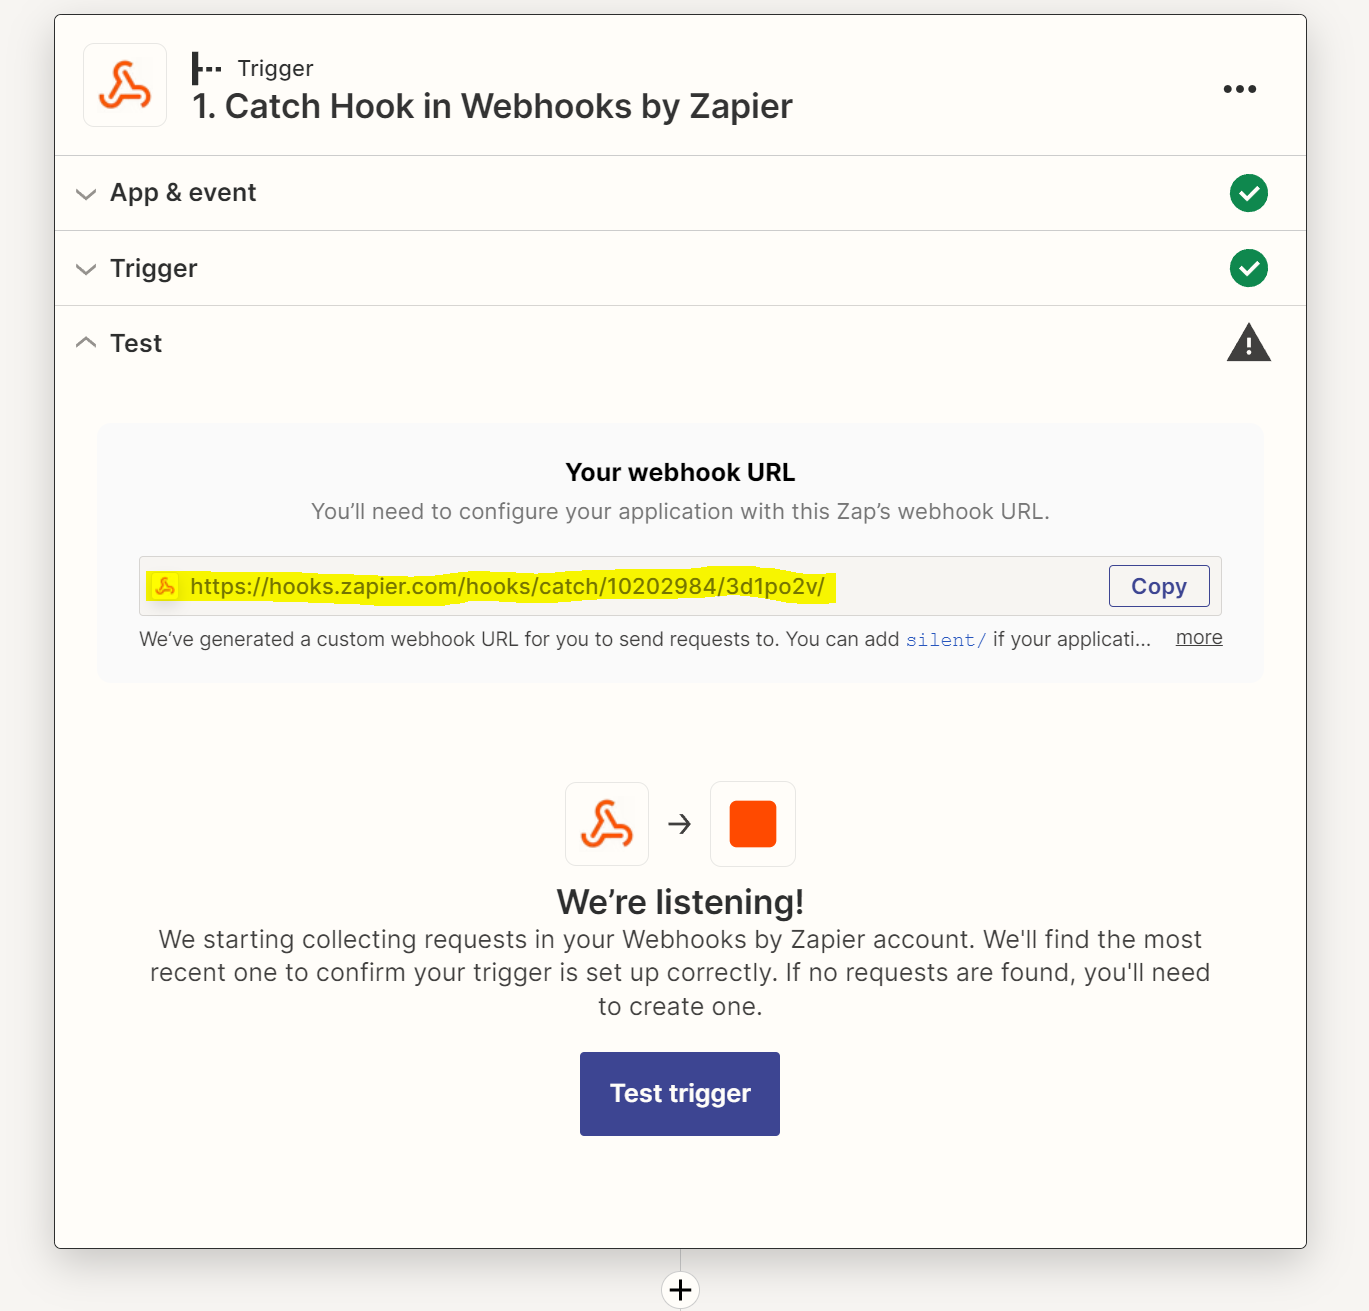
Step 4: Under Trigger Event, select Catch Hook.
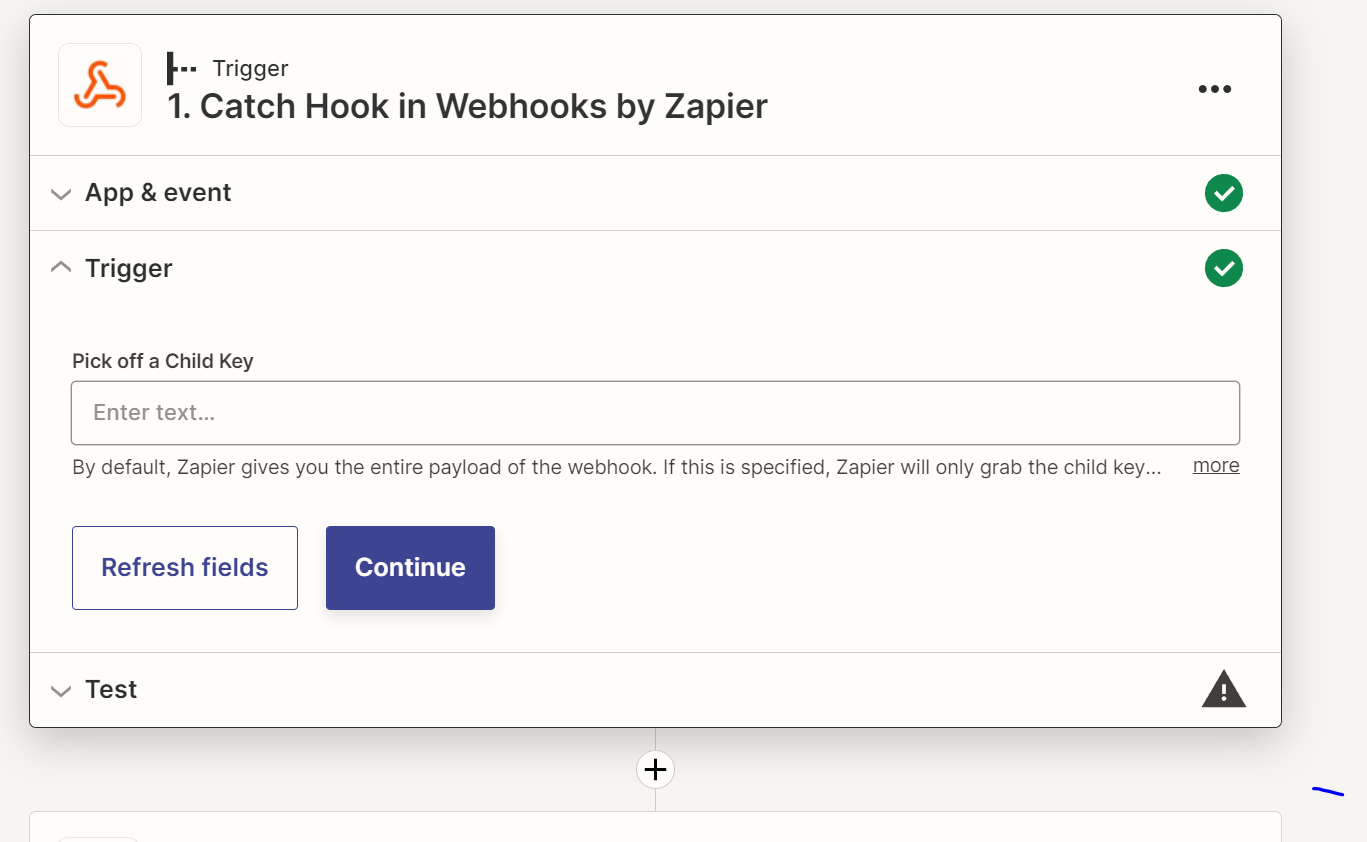
Step 5: On the next screen, leave the "Pick off a Child Key" field blank (unless you want to target a specific payload field).
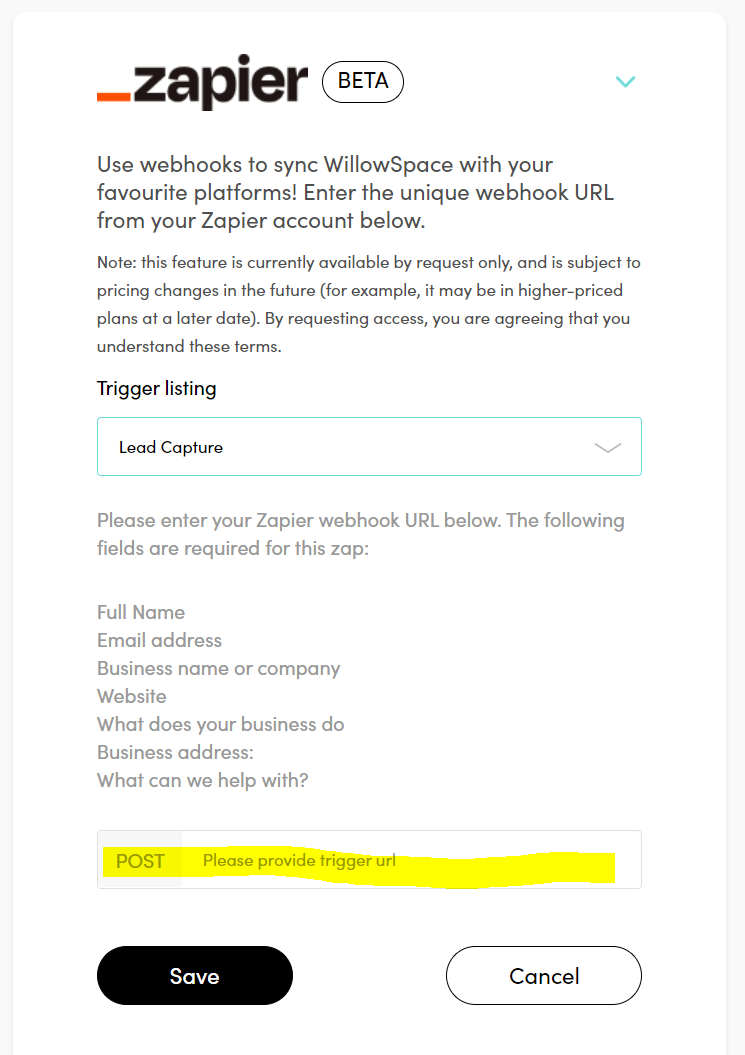
Step 6: Copy the webhook URL provided by Zapier.
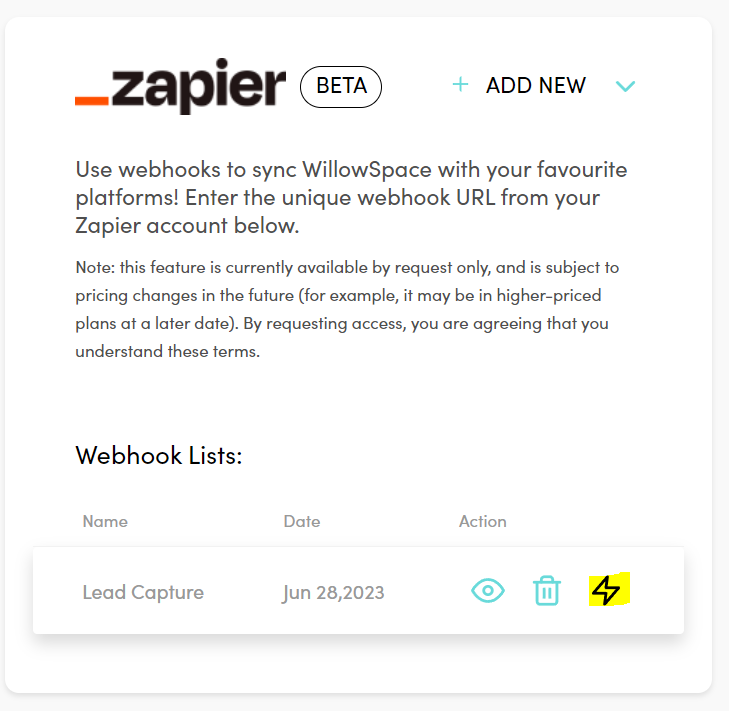
Step 7: Return to WillowSpace and paste this URL into your selected trigger field under the POST method. Click Save.
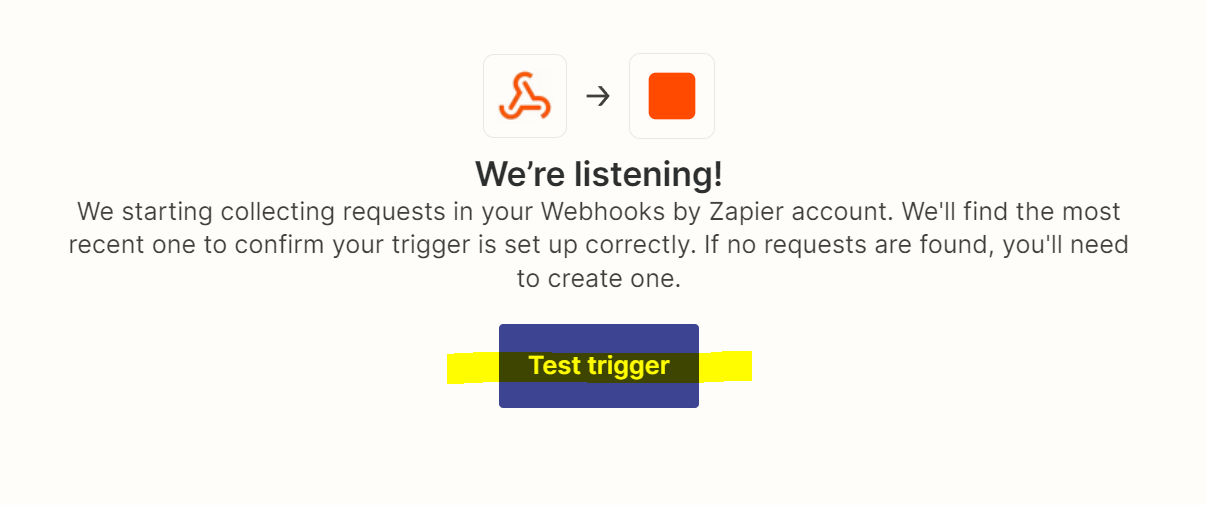
Step 8: Run a test trigger in WillowSpace, then return to Zapier and test it there as well to confirm it’s working.
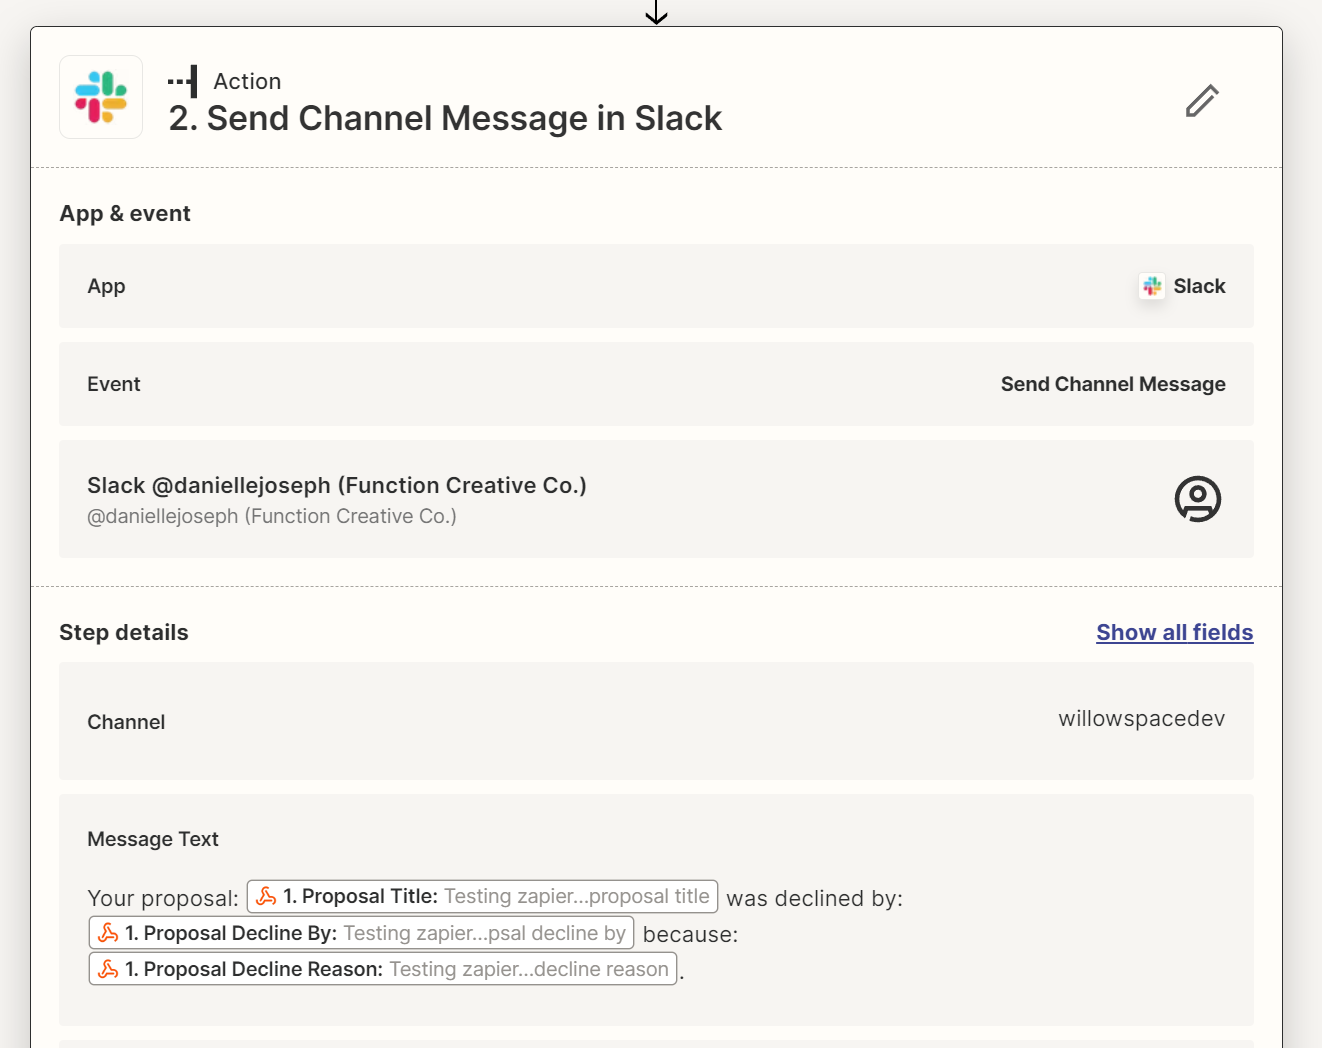
Step 9: Add your Action step in Zapier — this is where you choose the app you want to send data to (like Gmail, Slack, Google Sheets, Notion, etc.).
Step 10: Customize the action fields and test your Zap. If everything works, click Publish!
Best Practices
-
Always test your Zaps after setting them up.
-
If a Zap isn’t firing correctly, double-check that your webhook URL is saved under the POST method and that the selected trigger is correctly configured.
-
Keep your WillowSpace Zapier integration organized by naming your Zaps clearly (e.g., “Convert Lead to Airtable Entry”).
Need a Visual Walkthrough?
Watch our video tutorial inside the Zapier integration card in your WillowSpace account for a step-by-step guide.