The Client Portal is your client’s personalized space to stay informed, take action, and collaborate without the clutter of back-and-forth emails. WillowSpace makes the experience streamlined, intuitive, and beautifully on-brand.
Here’s everything your client can see and do from inside their portal.
What Clients See in the Portal
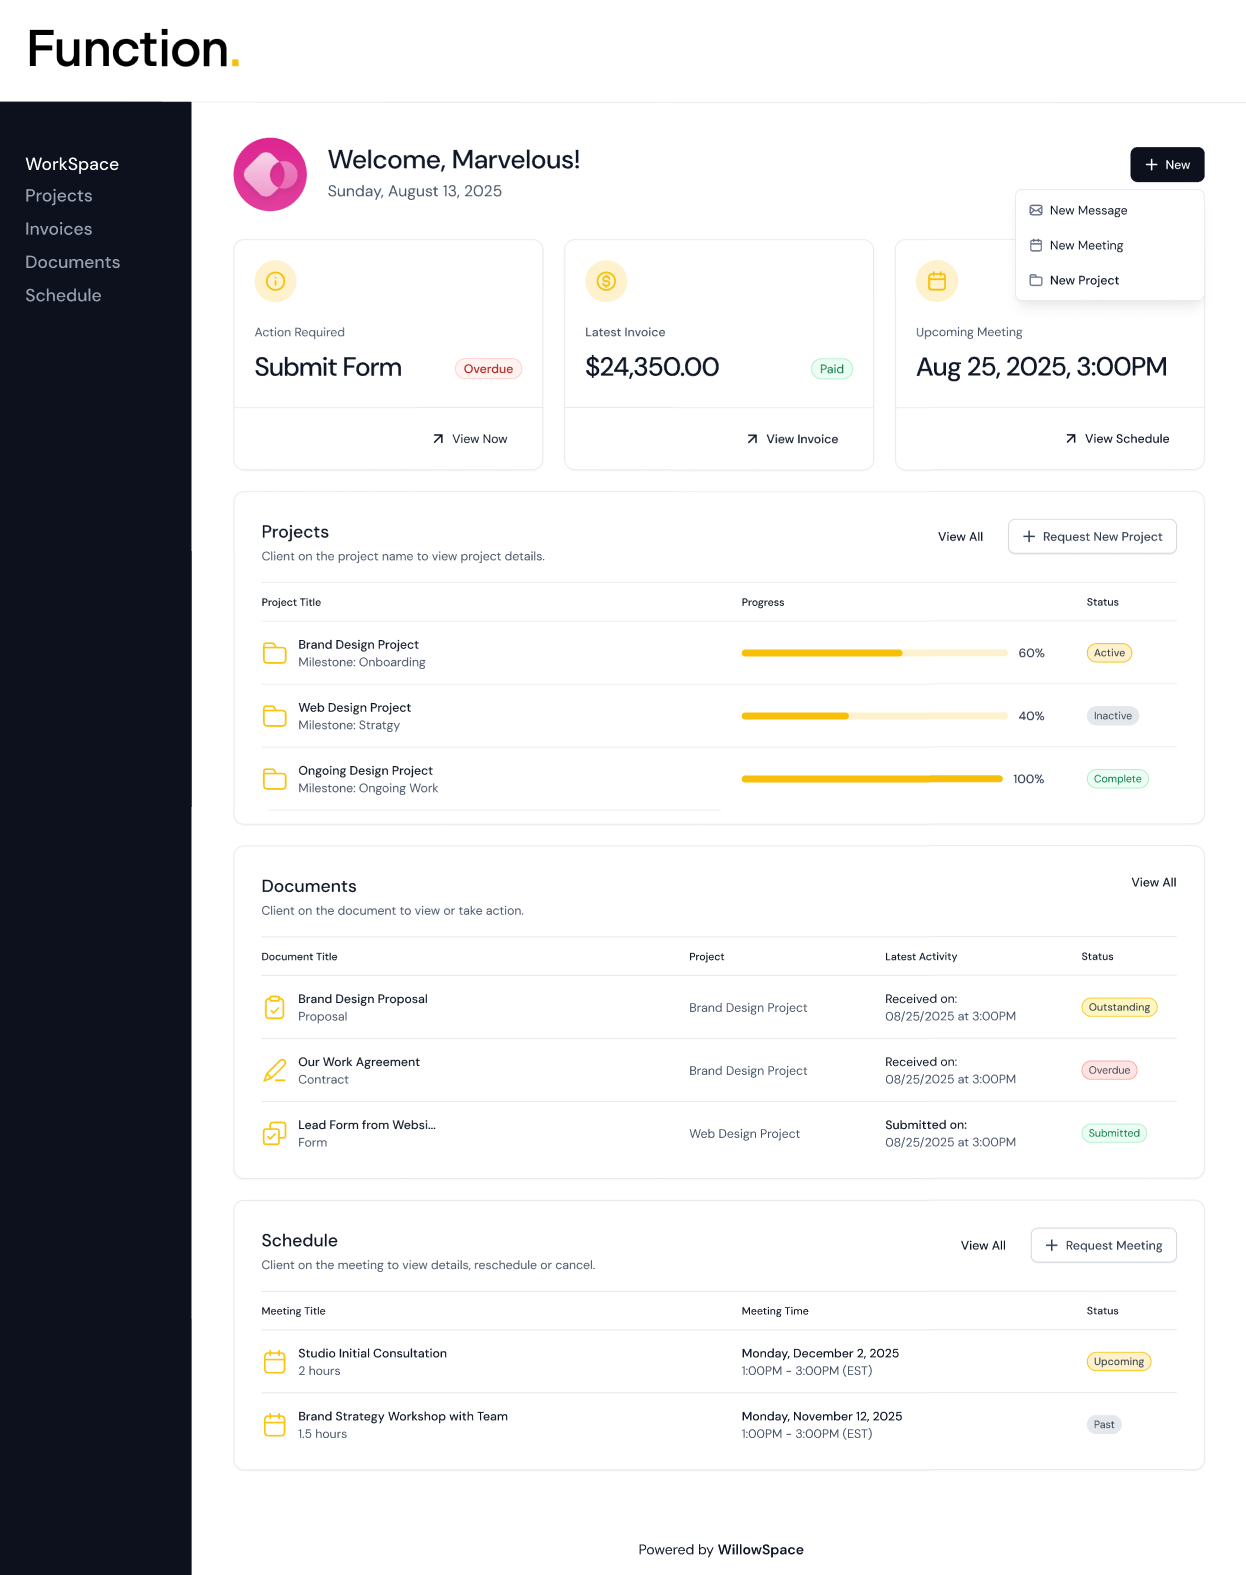
Once your client clicks their portal link, they’ll land in a clean dashboard that includes:
Action Items
-
Immediate prompts for anything requiring attention (e.g., "Submit Form" or "Sign Contract")
-
Status tags like “Overdue,” “Outstanding,” or “Submitted”
Project Overview
-
A list of their active, inactive, and completed projects
-
Progress bars based on milestones
-
Current project milestone (e.g., Strategy, Design, Offboarding)
-
The option to request a new project (if enabled)
Documents Section
-
All proposals, contracts, invoices, and forms assigned to them
-
Document status (e.g., Submitted, Paid, Overdue)
-
Viewable and actionable links—clients can sign, submit, or download
Schedule Section
-
Upcoming and past meetings
-
Status indicators (e.g., Upcoming, Past)
-
Ability to request a new meeting with a preferred date and time
Project Add-Ons (Optional)
-
Any additional services or upsells (e.g., strategy sessions, print assets) that you can customize in the Project Details when setting up or editing a client's project
-
Clear pricing and descriptions
-
One-click “Add to Project” request buttons
Security & Portal Settings
-
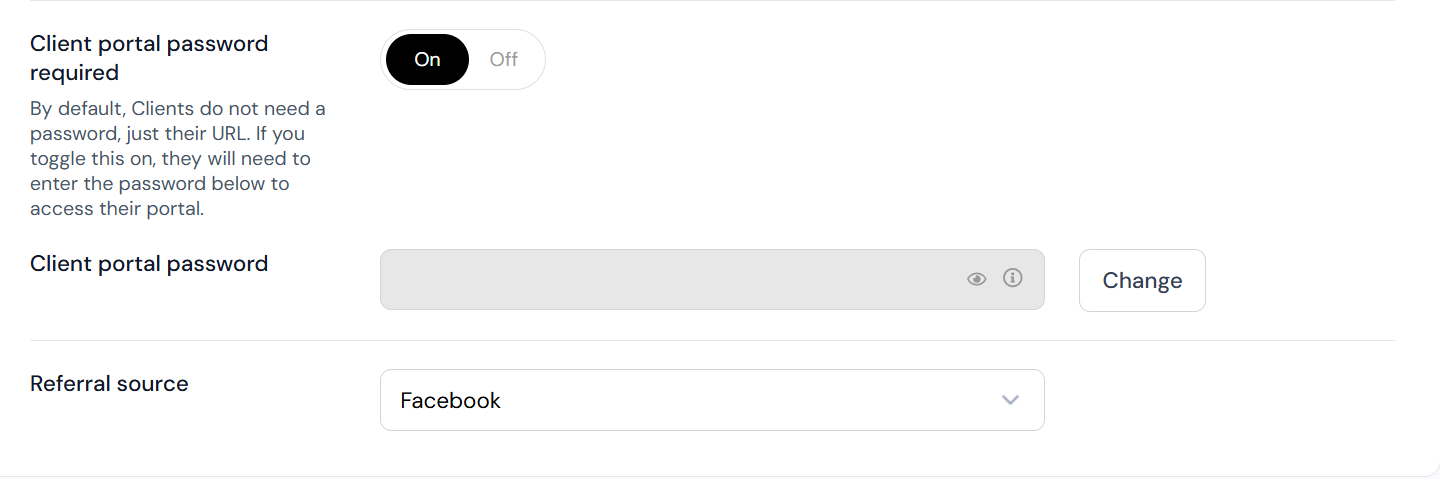
Portals are secure by default, accessible via a unique, unguessable link—no login required
-
If desired, you can enable password protection for added security (you can set this up in the Client Details when setting up or editing a client)
-
Clients will be prompted to enter the password before viewing their portal
To set a password:
-
Go to Clients > [Select Client]
-
Scroll to portal settings and toggle on password protection
-
Be sure to manually share the password with your client
Returning to the Portal
Once a client completes a document (e.g., submits a form or signs a contract), they’ll see an option to “Return to Portal” so they can continue reviewing project details or taking additional actions.
Viewing or Sharing the Portal Link
To access or share a client’s portal:
-
Go to Clients > Select a Client
-
Use the buttons on the right:
-
View Portal to preview what they see
-
Share Portal to copy or email the link directly
-
Why Use the Client Portal?
Client Portals help you:
-
Centralize communication and reduce follow-up emails
-
Create a high-end, seamless client experience
-
Encourage on-time form submissions, document approvals, and payments
It’s everything your client needs—all in one beautifully branded place.