WillowSpace makes it easy to create clean, professional invoices and send them to your clients—whether you're billing for a completed project, a deposit, or ongoing work.
There are three simple ways to create an invoice, depending on your workflow:
Option 1: From the Documents Section
-
Click Documents in the left-hand menu
-
Click + New Document
-
Choose Invoice from the document type dropdown
Option 2: From the Client Profile
-
Go to Clients in the left-hand menu
-
Select the client you want to bill
-
Click New Document > Invoice
This method automatically links the invoice to that client.
Option 3: From a Project
-
Click Projects in the side menu
-
Select the project associated with the invoice
-
Click New Document > Invoice
This links the invoice to both the client and project for easy tracking.
Creating and sending an invoice in WillowSpace is quick, flexible, and client-friendly. Whether you're billing for a one-time service or tracking multiple items for a project, the invoice builder gives you full control over what’s included, how it’s presented, and how it’s delivered.
Here’s a step-by-step guide to walk you through the process:
1. Invoice Settings
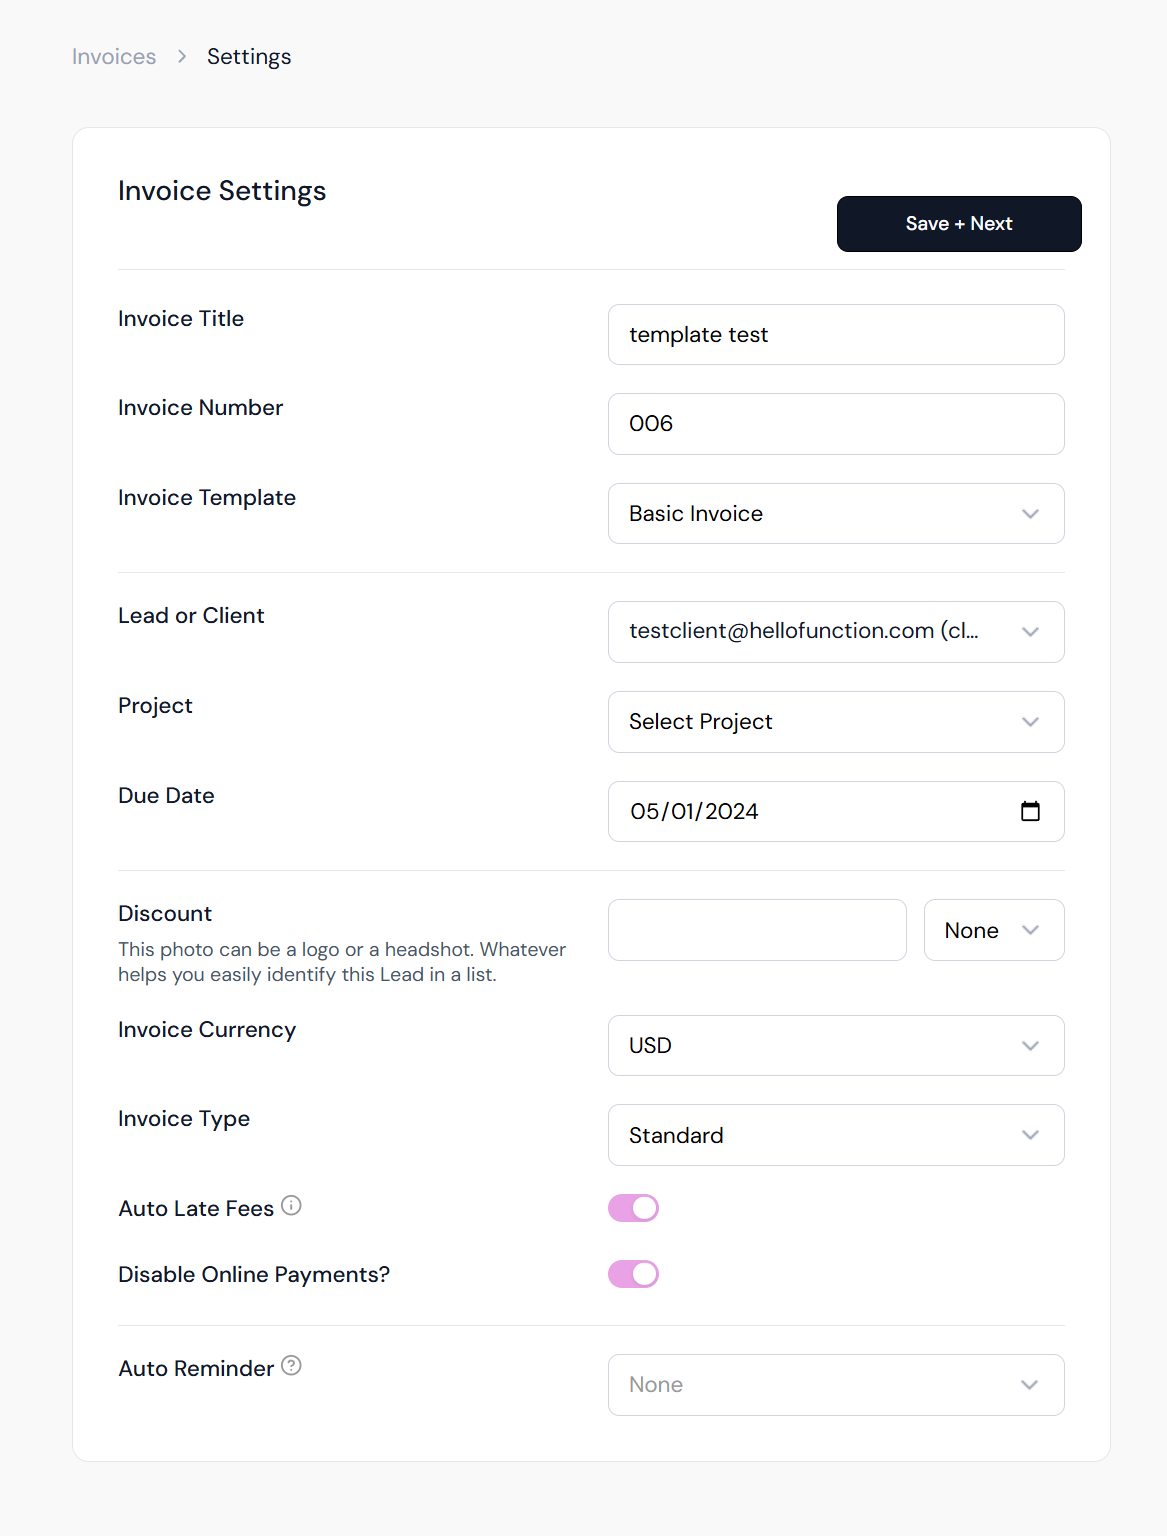
Once you select Invoice from the New Document screen, you’ll land on the Invoice Settings page. Here’s what each field means:
Invoice Title – Give your invoice a clear internal or client-facing name.
Invoice Number – Set or customize the number manually (or follow your internal numbering system).
Lead or Client – Select who the invoice is for.
Project (optional) – Link the invoice to a specific project for better organization.
Due Date – Set a clear due date so clients know when payment is expected.
Discount – Apply a discount either by percentage or fixed amount to be applied to the entire invoice as a whole (rather than individual line items)
Invoice Currency – Select your preferred currency.
Invoice Type – Choose standard for a one-off invoice or recurring for ongoing.
Auto Late Fees – Toggle on if you'd like automatic late fees applied after the due date.
Disable Online Payments – Toggle on if you want to restrict payment options to manual/offline.
Auto Reminder – Set automated email reminders to follow up before or after the due date.
Click Save + Next to move into the itemized design section.
2. Add Line Items
On the Design tab, you’ll add individual line items to your invoice.
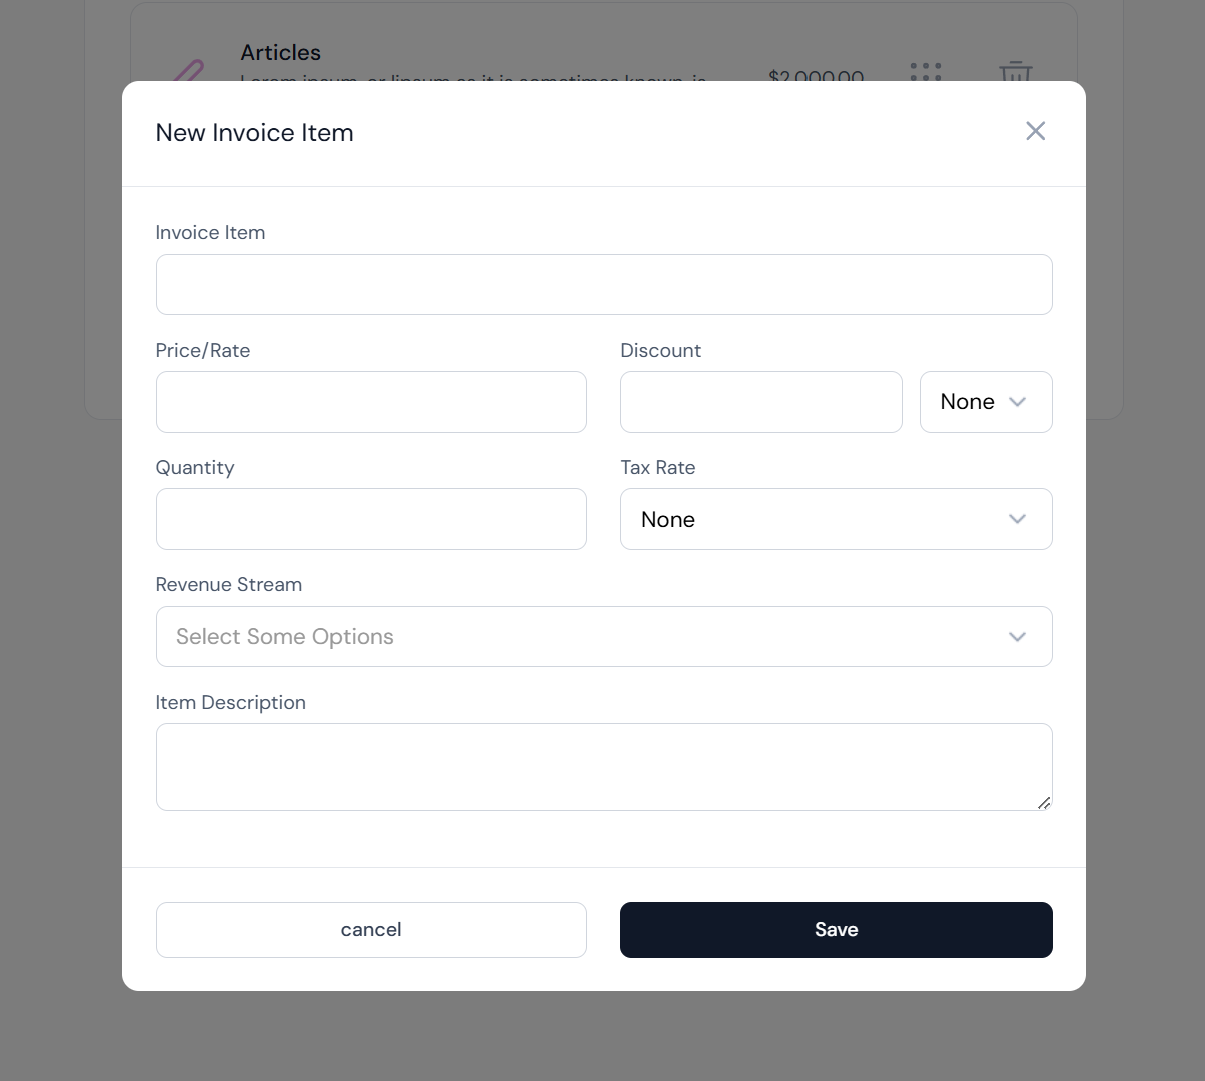
To add a new item:
-
Click the + button beneath your current list.
-
Fill in the following fields:
-
Invoice Item Name
-
Price/Rate
-
Discount (if applicable) in % or $ amount
-
Quantity
-
Tax Rate(s) (optional)
-
Revenue Stream(s) (used for internal reporting and not visible)
-
Item Description – Describe the item or service for clarity.
-
Click Save once the item is complete. Repeat for each additional item.
You can reorder items using the drag handles on the right or delete items using the trash icon.
Click Next when you're ready to move on.
3. Send or Share Your Invoice
The final step is the Share screen. Here, you have three options:
-
Email the Invoice – Sends the invoice directly to the selected client(s) from inside WillowSpace.
-
Direct Link – Copy and paste the invoice URL to share via email, DMs, text, or elsewhere.
-
Download PDF – Save a PDF version for offline sharing or storage.
Once sent, your client can view and pay the invoice (if online payments are enabled), and you’ll be able to track when it’s viewed or completed.
Pro Tips
-
Use Auto Reminders for a hands-off follow-up process
-
Duplicate past invoices for similar projects, line items, or recurring services
-
Link invoices to projects for better financial tracking
- Add invoice footer notes in the Finance Settings area
- Include your business number or PayPal link in the invoice footer area
🚀 After You Create an Invoice
Once your invoice is ready, you can:
-
Send it directly to the client via email
-
Download it as a PDF for your own records or to send manually
-
Duplicate it to reuse for another client or project
-
Track its status (e.g., sent, viewed, paid)
💡 Tip: Use clear item names, due dates, and payment instructions to make it easy for clients to process your invoice on time.