💡 Right now, each workspace has one lead form, but we’re building support for multiple forms soon. For now, you can edit this form anytime for different use cases.
One of our favorite things about WillowSpace is how easy it is to manage inquiries and turn potential clients into organized leads.
Your Lead Capture Form is the first step. It can be embedded on your website or shared via a direct link—making it easy to collect info, send auto-responses, and get new leads into your pipeline.
Step 1: Access Your Lead Form
-
Log in to your WillowSpace account.
-
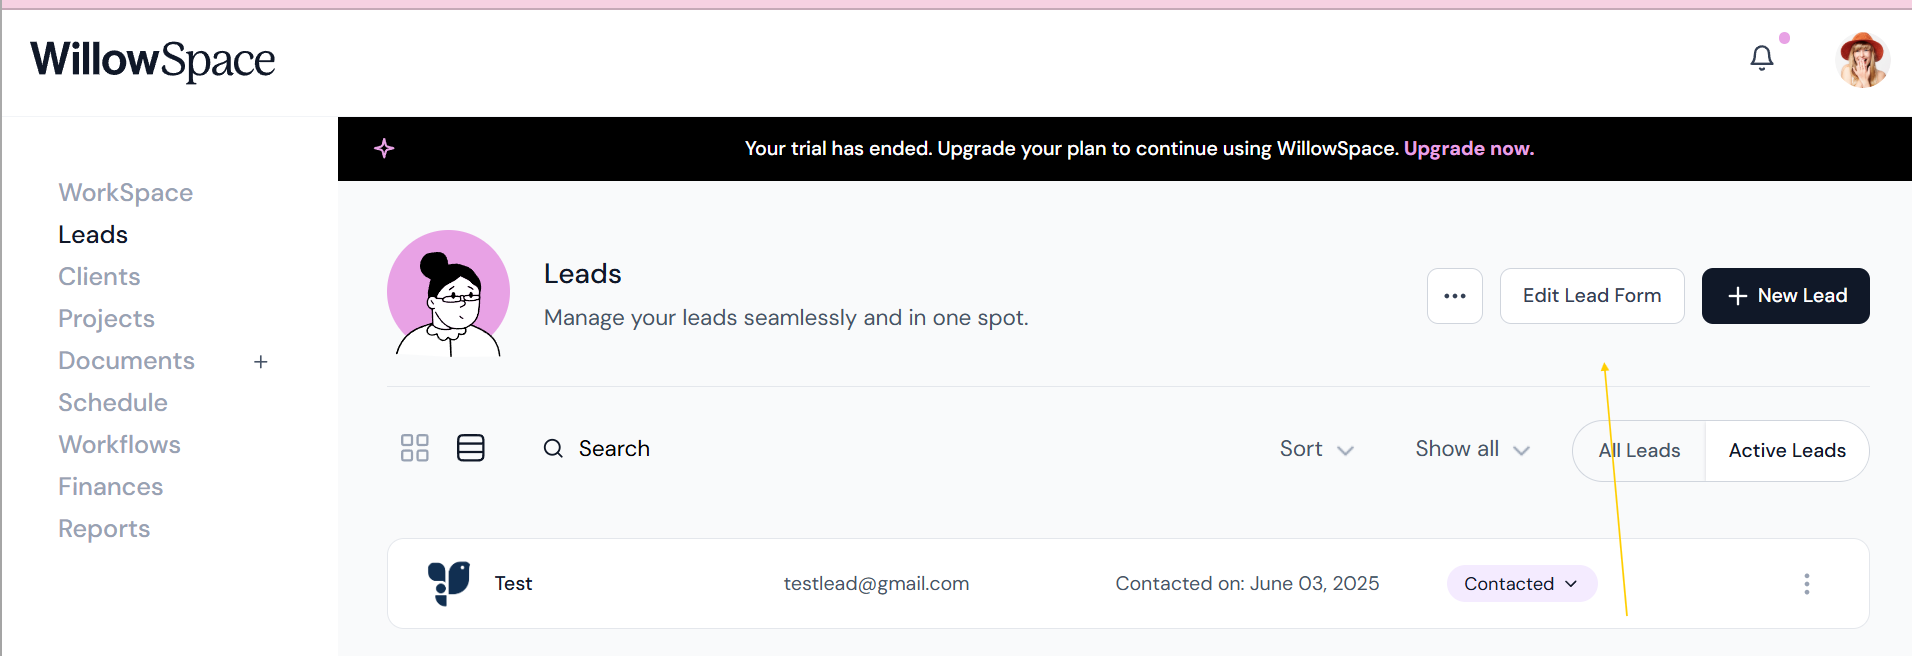
Go to Leads in the main menu.
-
Click Edit Lead Form.
Step 2: Customize Your Settings
You’ll start by adjusting the form settings:
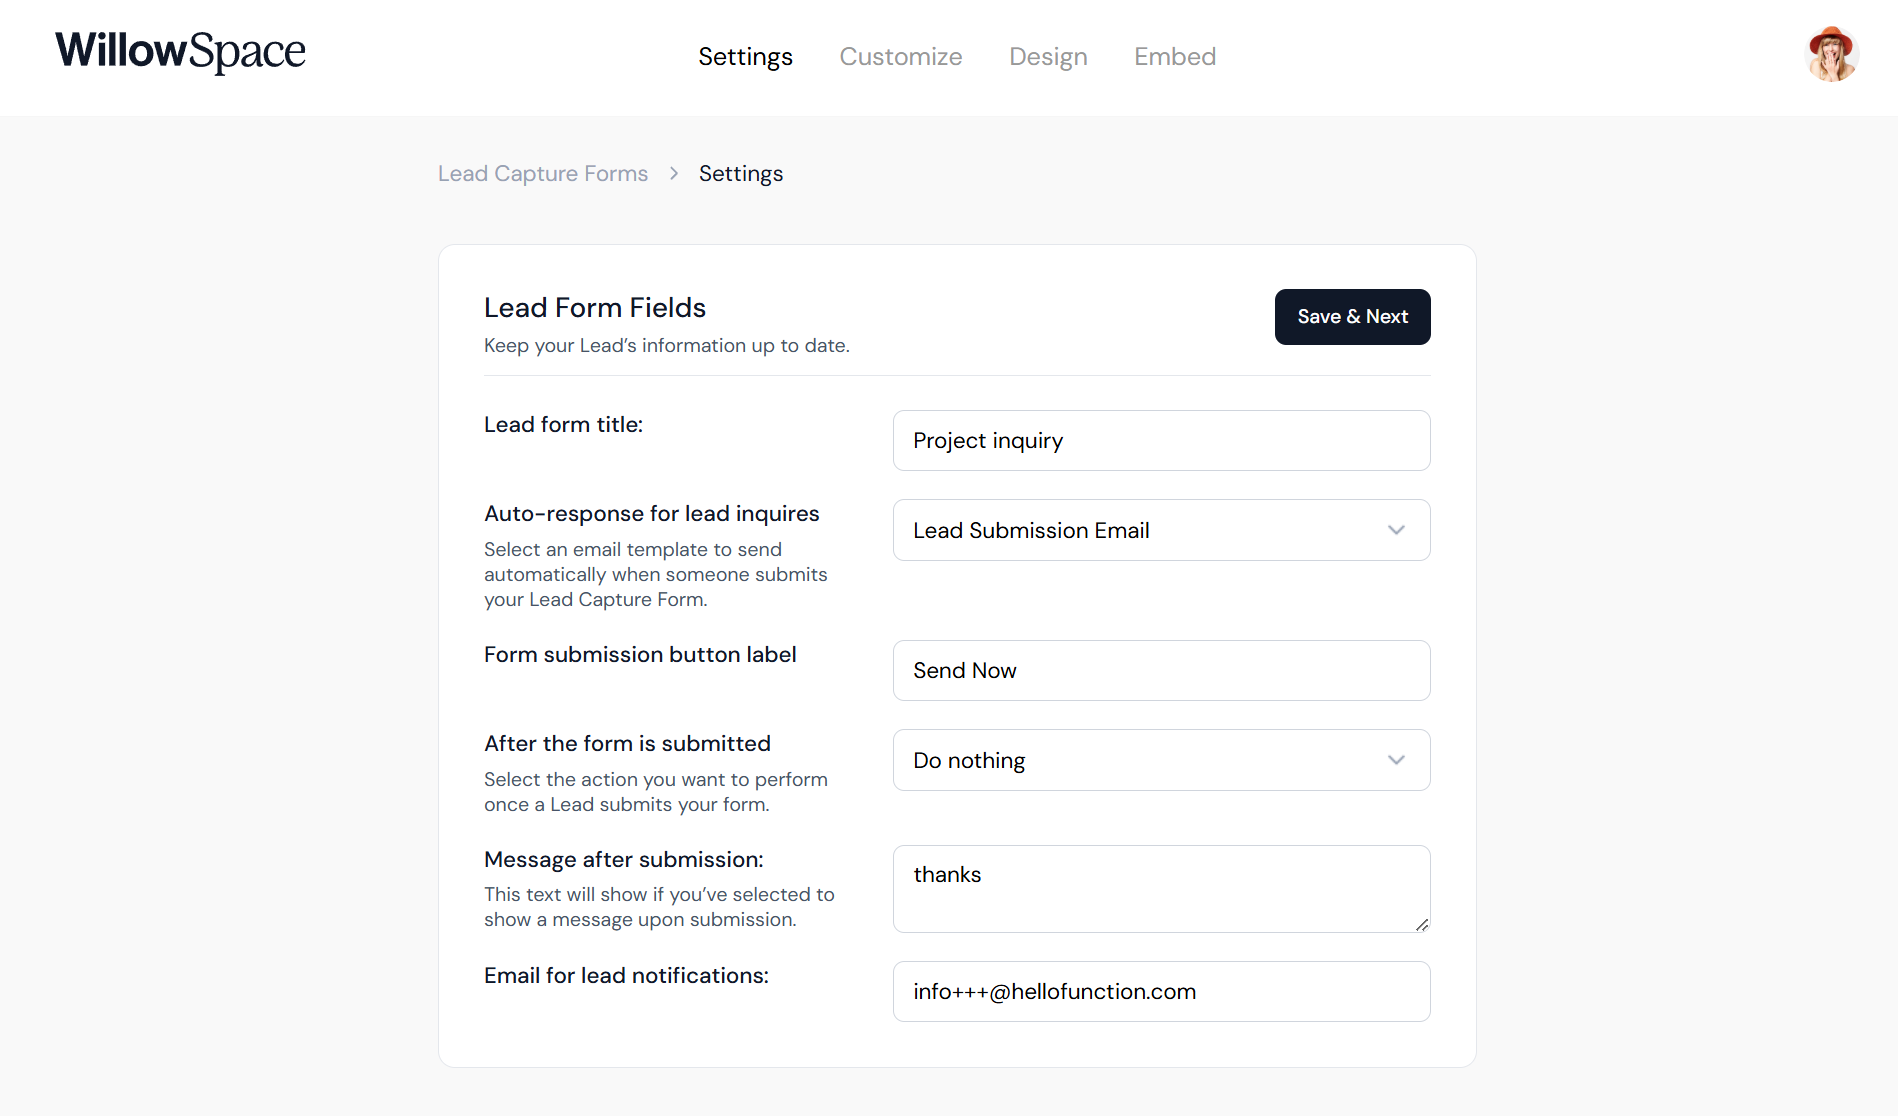
- Form Title
-
Auto-Response Email:
Choose whether to automatically send a response when someone submits the form. You can turn this on or off at any time by selecting "None" - Button Label:
Choose what the button says when a lead is ready to submit your form. This keep brand voice top of mind! - Message After Submission:
This text will show up once a lead submits their inquiry form. You can customize this to match your brand voice, or include next steps. - Email for Notifications:
Your WillowSpace account email will show here by default. If someone else on your team manages your inquiries, you can update this email to send lead notifications elsewhere. -
After Submission Settings:
Decide what happens after someone hits “submit.” A confirmation message will always show. What happens next is up to you. Options include:-
Redirect to a specific URL.
-
Do nothing (stay on the same page).
-
Step 3: Build and Organize Form Fields
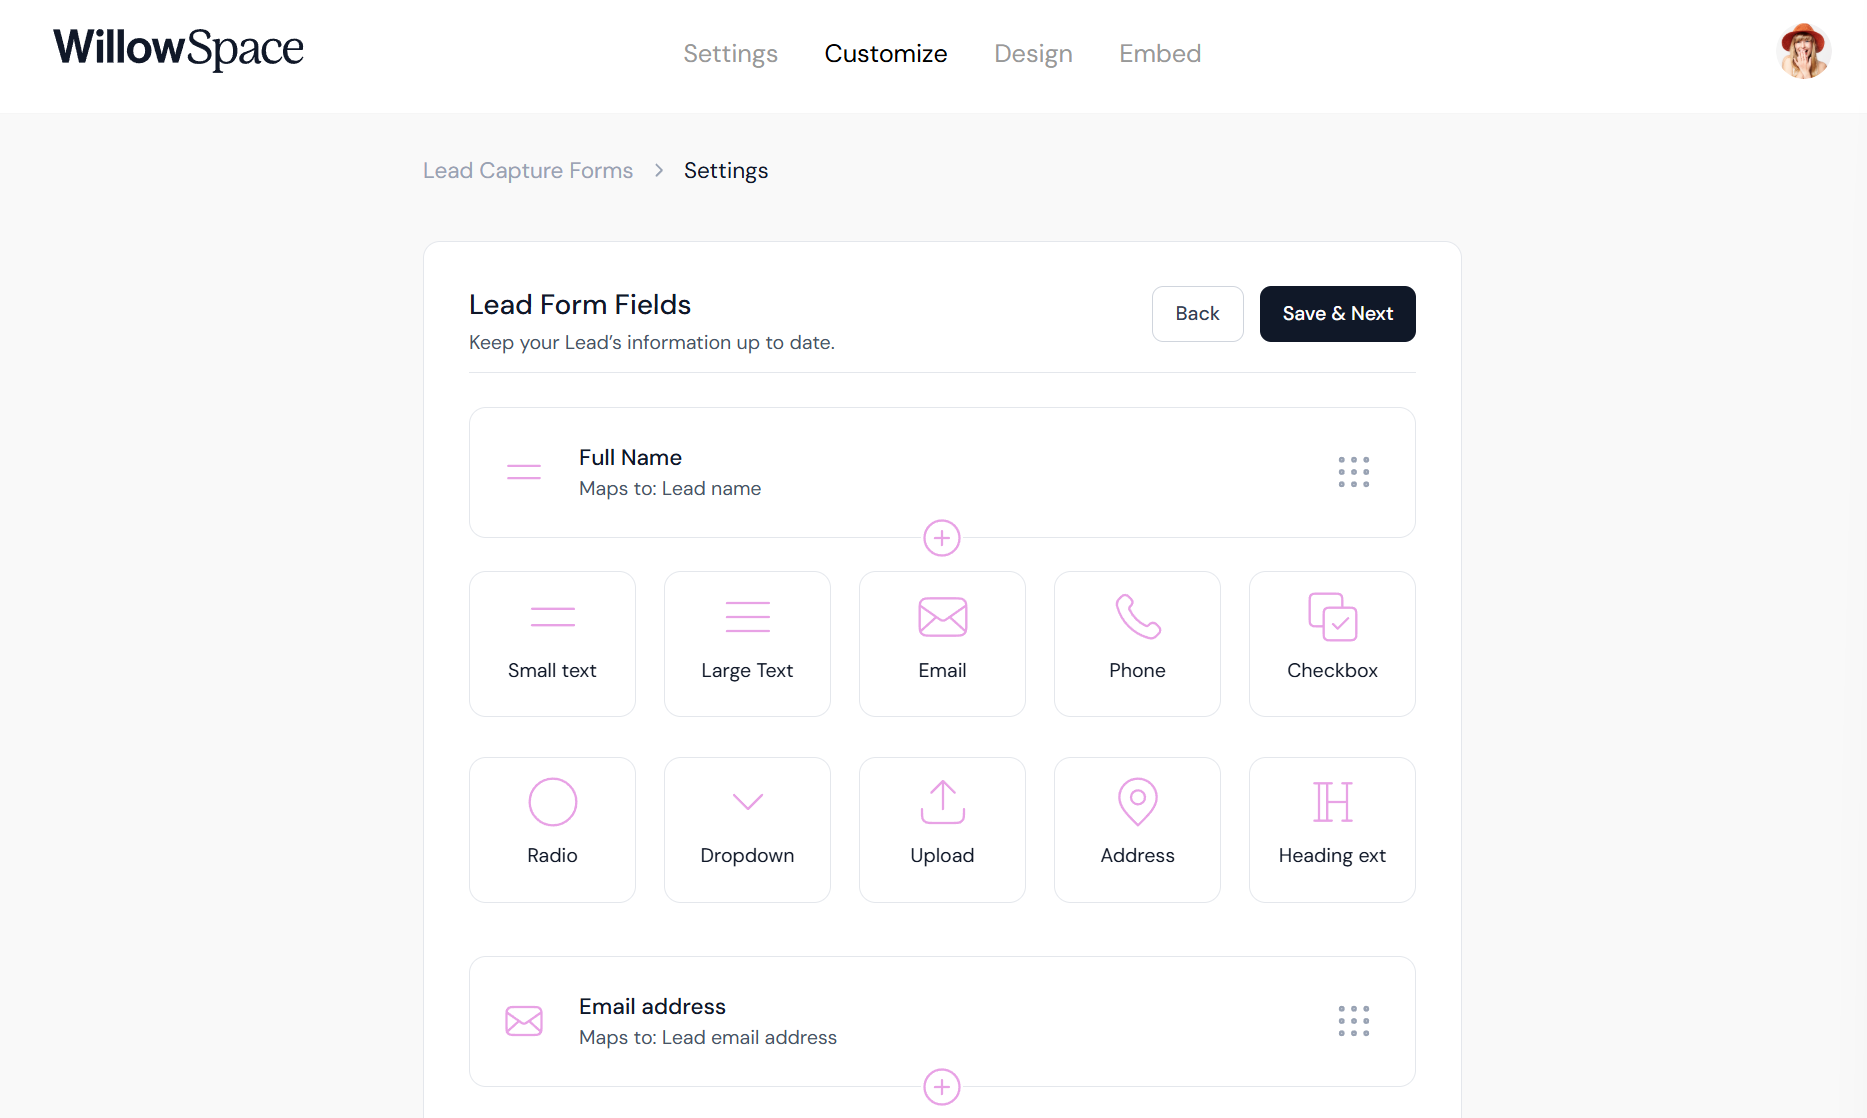
Next, customize your questions and layout:
-
Add Questions: Use the ➕ buttons to add new fields to your form. Fields include:
- Small text
- Large text
- Email address
- Phone number
- Checkbox
- Radio buttons (yes/no)
- Dropdown
- Upload file area
- Address/location
- Heading/title text
-
Edit or Map Responses: Assign responses to areas in your account (e.g., email, project type).
-
Make Fields Required or Optional.
-
Reorder: Use the 9-dot icon to drag and rearrange.
-
Delete Questions: Click the trash can icon.
Each question includes settings like field type, display name, and where that response should be mapped inside WillowSpace.
Step 4: Style and Design Your Form
Once your questions are finalized, click Save & Next to access the Design Tab:
Here, you can fully customize the look and feel of your form:
-
Fonts
-
Button styles
-
Field shapes and layout
-
Colors and spacing
Want to match your exact website style? Use the CSS tab to go deeper:
-
Add custom fonts
-
Adjust padding or spacing
-
Apply your brand styles
Step 5: Share or Embed
When you're happy with how your form looks:
-
Go to the Embed Tab
-
Copy the embed code to place it on your website as an inline form, or modal pop-up button
-
Or share the unique link anywhere (email, social media, etc.)
That’s it! Once your form is live, every submission automatically creates a new lead in your WillowSpace account—so you can start booking, following up, and converting with ease.